Virtual Camera Usage
Quick Start
1. Start the Service
python app.py --transport virtualcam --model wav2lip --avatar_id wav2lip256_avatar1OBS Studio: Add Video Capture Device → OBS Virtual Camera
You need to download and launch OBS Studio first.
2. Open the Control Page
Visit in your browser: http://localhost:8010/virtualcam.html
3. Control the Digital Human
- Enter text and click “Send Text” to make the avatar speak
- Click “Interrupt Playback” to stop speaking
- Or use keyboard shortcuts:
Ctrl+Enterto send,Escapeto interrupt
4. Use in Other Applications
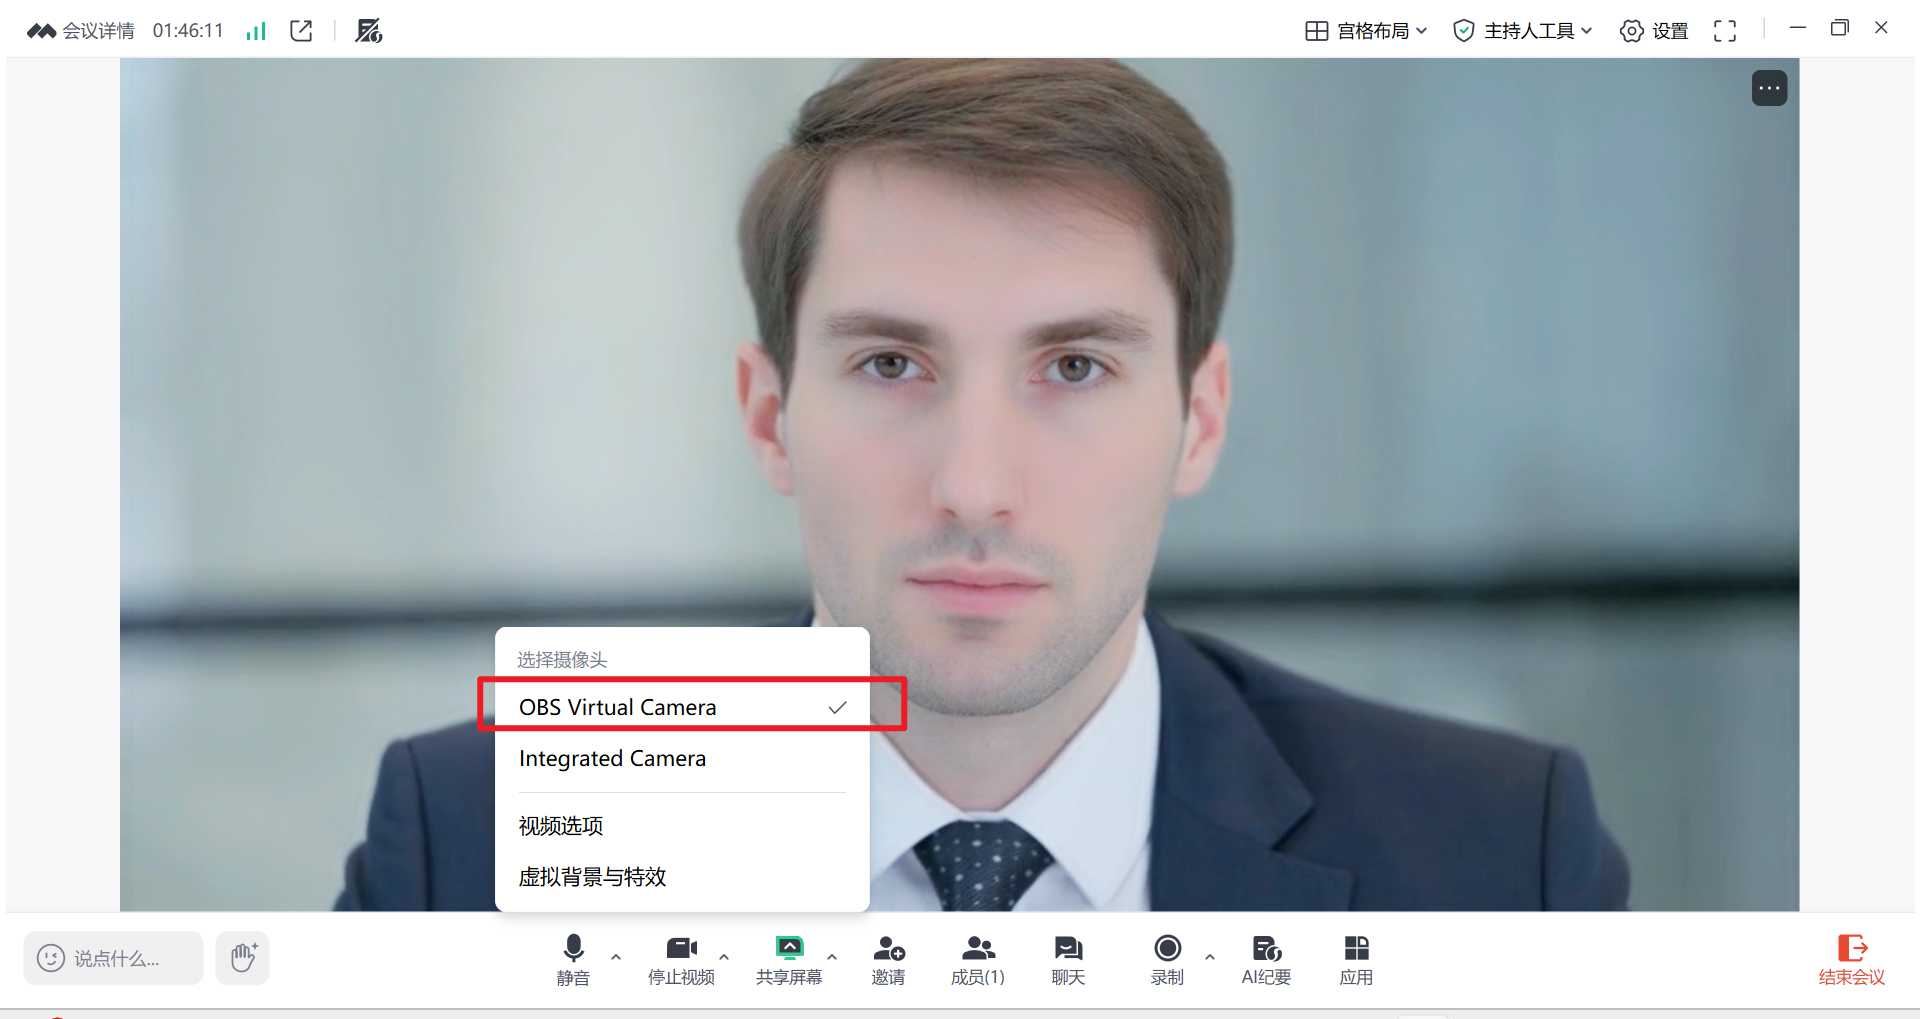
- Zoom/Teams: Select camera “OBS Virtual Camera”
- To use the newly created virtual camera in Tencent Meeting, follow the steps below:
Feature Overview
Key Features
✅ Background rendering – independent of browser tabs ✅ Automatic audio device – auto-detects the system default speaker ✅ Color correction – automatically converts BGR to RGB ✅ Web console – full HTTP API and page-based control ✅ Real-time monitoring – live display of speaking status and device information
Operating Modes
| Mode | Command | Description |
|---|---|---|
| Virtual Camera | --transport virtualcam | Runs in the background and streams to OBS Virtual Camera |
| WebRTC | --transport webrtc | Traditional mode accessed via browser |
Usage Guide
Installing and Configuring OBS Studio
Relationship Between OBS and pyvirtualcam
- OBS Studio: Provides the virtual camera device driver
- pyvirtualcam: Python library that pushes video streams to the virtual camera
- Zoom/Teams/Tencent Meeting: Receives video from the virtual camera
Workflow: OBS creates the device → pyvirtualcam pushes video → third-party applications receive the feed
Installation Steps
Download and install OBS Studio
- Official website: https://obsproject.com/
Launch OBS Studio once on first use
- Open OBS Studio for the first time
- This activates the virtual camera device
- Close OBS afterwards (the device remains registered in the system)
Verify the virtual camera is registered
import pyvirtualcam

try:
    cam = pyvirtualcam.Camera(width=640, height=480, fps=30)
    print(f"Success: {cam.device}")  # Expected output: OBS Virtual Camera
    cam.close()
except Exception as e:
    print(f"Failed: {e}")
Important Notes:
- ✅ OBS only needs to be opened once for initial activation
- ✅ No need to keep OBS open afterward; the device stays available
- ✅ The device persists after system reboot
Prerequisites
# Install Python dependencies after installing OBS Studio
pip install pyvirtualcam pyaudio
Basic Usage
Automatic Audio Device (Recommended)
python app.py --transport virtualcam --model wav2lip --avatar_id wav2lip256_avatar1Manually Specify the Audio Device
# 1. List available audio devices
python list_audio_devices.py

# 2. Launch with the selected device index
python app.py --transport virtualcam --audio_output_device 25
Using YAML Configuration
# config.yaml
transport: virtualcam
model: wav2lip
avatar_id: wav2lip256_avatar1
audio_output_device: 25  # Optional
python app.py # Automatically loads config.yamlControl Page Functions
Visit: http://localhost:8010/virtualcam.html
Modules
| Module | Function |
|---|---|
| Status Display | Real-time speaking status, virtual camera info, audio device details |
| Voice Output | Text input, send text, interrupt playback, quick phrases |
| Runtime Config | Read-only view of current parameters (Avatar, TTS, voice tone, etc.) |
| History Log | Saves the latest 20 entries; click to replay |
Keyboard Shortcuts
| Shortcut | Function |
|---|---|
Ctrl + Enter | Send text |
Escape | Interrupt playback |
HTTP API
# Send text
curl -X POST http://localhost:8010/human \
  -H "Content-Type: application/json" \
  -d '{"sessionid":"0","type":"echo","text":"Hello"}'

# Stop speaking
curl -X POST http://localhost:8010/interrupt_talk \
  -H "Content-Type: application/json" \
  -d '{"sessionid":"0"}'

# Check speaking status
curl -X POST http://localhost:8010/is_speaking \
  -H "Content-Type: application/json" \
  -d '{"sessionid":"0"}'

# Fetch full configuration
curl http://localhost:8010/api/virtualcam/status
Audio Device Configuration
List Devices
python list_audio_devices.pySample output:
[Output Devices]:

Device Index: 5
  Name: Speakers (2- Realtek(R) Audio)
  Output Channels: 2

Device Index: 25
  Name: Speakers (2- Realtek(R) Audio)
  Host API: Windows WASAPI
Device Selection Tips
- Prefer WASAPI devices (usually index 22–27) – low latency
- DirectSound devices (usually index 15–21) – better compatibility
- Leave blank to use the system default – automatic selection with minimal setup
Troubleshooting
Q1: No audio output
Troubleshooting Steps:
- Check startup logs:
[VirtualCam Audio] Using default output device: Speakers (index 25)- Confirm the selected index belongs to an output device:
python list_audio_devices.py- Manually assign the audio device:
python app.py --transport virtualcam --audio_output_device 25- Verify TTS works normally (look for
doubao tts Time to first chunkin logs)
Q2: Video tinted blue
Fixed: The code automatically converts color space from BGR to RGB.
Q3: RuntimeError: virtual camera output could not be started
Cause: The virtual camera device is not registered or activated.
Solutions:
- Confirm OBS Studio is installed: https://obsproject.com/
- Launch OBS once for initialization
- Open OBS Studio
- Close it afterward (device is activated)
- Verify registration with this script:
import pyvirtualcam
cam = pyvirtualcam.Camera(width=640, height=480, fps=30)
print(cam.device) # Expected output: OBS Virtual Camera- OBS does not need to stay open afterward.
Q4: ModuleNotFoundError: No module named ‘pyaudio’
pip install pyaudio
# or
pip install pipwin && pipwin install pyaudio
Q5: ModuleNotFoundError: No module named ‘pyvirtualcam’
pip install pyvirtualcamQ6: How to verify the virtual camera works properly?
- Check startup logs:
VirtualCam output started: OBS Virtual Camera with resolution 1280x720- Test inside OBS:
- Add a “Video Capture Device”
- Select “OBS Virtual Camera”
- You should see the digital human video
- Send a test request:
curl -X POST http://localhost:8010/human -H "Content-Type: application/json" -d '{"sessionid":"0","type":"echo","text":"Test message"}'Q7: High audio latency
Optimizations:
- Use WASAPI audio devices for low latency
- Close other audio-consuming applications
- Monitor and reduce CPU usage
Technical Architecture
Rendering Pipeline
app.py
  └─> Create Session 0
      └─> render() Thread
          └─> inference() Generates video frames
              └─> process_frames() Pushes frames
                  └─> virtualcam.py
                      ├─> Video: BGR→RGB → pyvirtualcam
                      └─> Audio: PyAudio → Speakers
API Endpoints
| Endpoint | Method | Function |
|---|---|---|
/human | POST | Send text content |
/interrupt_talk | POST | Stop current speech |
/is_speaking | POST | Query speaking status |
Core Files
| File | Purpose |
|---|---|
config.py | Command-line argument definitions |
app.py | Main entry & startup logic |
base_avatar.py | Rendering thread implementation |
streamout/virtualcam.py | Virtual camera stream output |
web/virtualcam.html | Web control panel |
list_audio_devices.py | Audio device listing utility |
Summary
The virtual camera feature is fully implemented with the following capabilities:
✅ Core Features – automatic audio detection, color conversion, background rendering ✅ Ease of Use – web dashboard, HTTP API, interactive operation ✅ Stability – independent worker threads, exception handling, resource cleanup
You can now stream your digital human directly into Zoom, Teams, OBS and other video applications!